


TABLE OF CONTENTS
- How To Set Up Venmo for Business With a Venmo Personal Account
- How To Set Up Venmo for Business Without a Personal Account
- Getting Started With Venmo for Business With PayPal
- Setting Up Venmo for Business Without PayPal
- How Can Customers Set Up Venmo to Pay for My Business?
- Receiving Money From a Business Transaction on Venmo
- Choosing the Best Payment Option for Your Business
- Frequently Asked Questions
Today’s consumers expect efficiency and convenience at every step of the buyer journey—but especially when paying. And Venmo for Business is among the more popular solutions. This complete, step-by-step guide will walk you through how to set up a Venmo account for your business.
The setup process can vary based on a few factors, such as whether you have a personal Venmo account and whether you’ll be using it with PayPal. It might sound daunting, but don’t worry—this guide provides screenshots and expert tips to simplify your system implementation.
We’ll also talk through the pros and cons of Venmo for Business, including its extra features and costs. This way, you can make your decision with all the facts in hand—and pick a payment processor that suits the unique needs of your business.
How To Set Up Venmo for Business With a Venmo Personal Account
If you already have a personal Venmo account, you can create a business profile within your existing login in just three steps.
If you aren’t sure whether your existing Venmo account is personal or business, check the app or website. Look for the drop-down menu under your profile to see if there’s an option titled “Create a Business Account.” If there is, you have a personal profile.
Those with both a business and a personal account will see the option to navigate between the two through the drop-down menu on your profile. All you need are the login credentials for each profile.
If you don’t yet have a business account, here’s how to get one:
1. Create Your Account
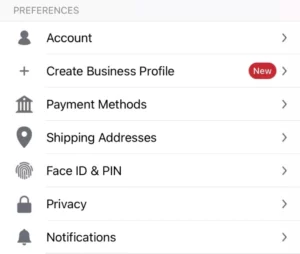
Open your Venmo app and click on the “Me” tab with your profile picture on the bottom right side of your screen. Then, look for the settings icon on the top left of your screen and click it. From here, you’ll see the second option of your account preferences tab, labeled “Create Business Profile.”
2. Add Business Details
Once you’ve clicked on the “Create Business Profile” option, you’ll be prompted to input relevant information like your professional name, a profile picture, and a background image. These elements will determine how your small business appears to customers, so choose branded marketing materials. You must also provide your Social Security number (SSN) or your business employer identification number (EIN) to verify the account.
3. Publish Your Profile
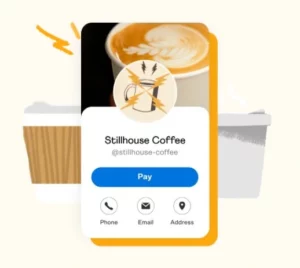
The final step is to publish your account. Now, customers can find your business through the platform. If applicable, at this stage you can also utilize tipping features, returns barcodes, and chargebacks through your business account settings.
How To Set Up Venmo for Business Without a Personal Account
If you don’t already have a personal Venmo account, you must sign up for one to create your business profile. However, you can create both your business and personal accounts at the same time.
Just as you can toggle between your personal and business accounts in the mobile app, you’ll also be able to access both profiles through a web browser. However, you’ll need the app to complete identity verification procedures when accessing the platform from a browser.
1. Sign Up for the Account
First, download the Venmo app, which is available for both IOS and Android. You’ll then be prompted to choose how to set up your Venmo. Will your account be business or personal?
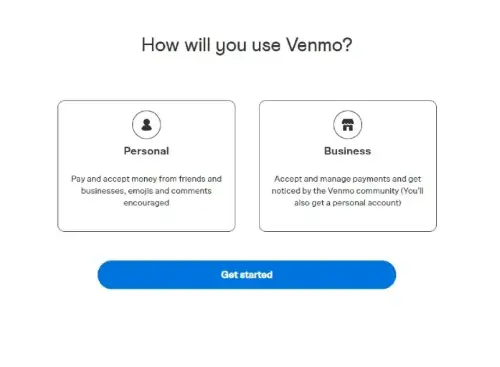
2. Input Relevant Information
Choose the business account option, and the platform will automatically prompt you to create both account types at the same time. You’ll be asked to furnish and verify relevant information like your phone number, email address, and bank account.
3. Complete Your Business Profile
At this stage, your personal profile is up and running. You can then input your business details, such as your SSN or EIN, profile picture, background photo, name, and address. Finally, you can preview your professional profile and publish it. At this point, your customers will be able to send payments through the platform.
Getting Started With Venmo for Business With PayPal
Many businesses are already using PayPal as a digital transaction processing method. So, let’s look at how to set up Venmo for business with PayPal integration.
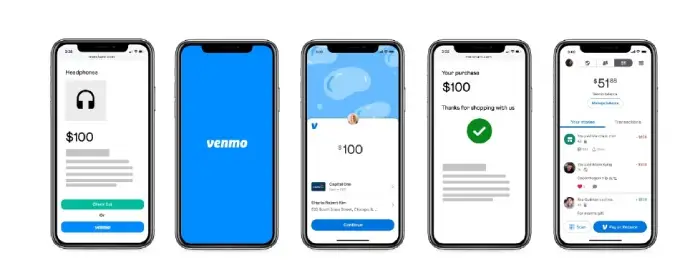
If you’re a PayPal user, you can integrate Venmo with your existing checkout process to offer customers multiple mobile payment options. When a customer is ready to check out, they’ll be able to complete their transaction through either their PayPal or Venmo account. With this integration, the merchants’ fees you regularly incur during a PayPal transaction will remain the same.
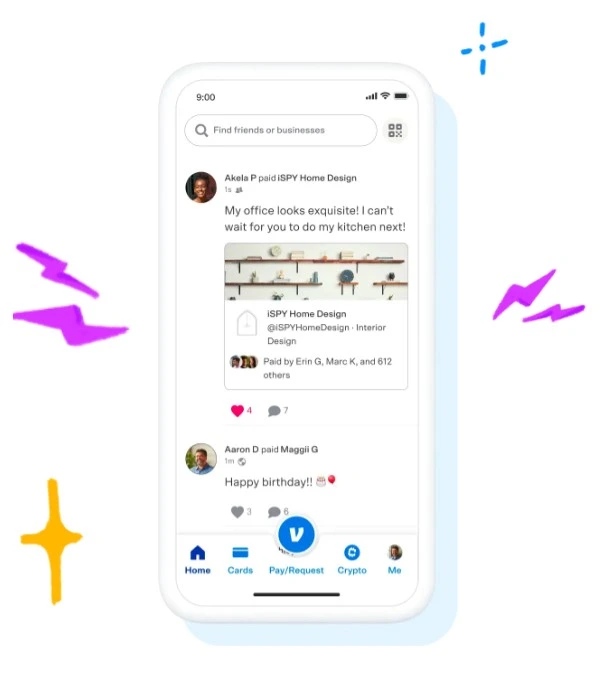
From the customer’s view, this integration works by simply adding a Venmo button to the PayPal checkout screen. This, in turn, enables Venmo’s features like split payments and transaction feeds. Plus, customers will be able to choose their preferred payment option, which can ultimately smooth out the end of your sales funnel.
Adding Venmo to your PayPal checkout requires some technical skill because the button must be integrated using JavaScript SDK code. However, all you need to do is integrate the code into the front end of your site and test the results.

Setting Up Venmo for Business Without PayPal
Integrations are a key component of how you set up Venmo for your business. While Venmo provides a mobile platform for payments, it relies on integration with another application to handle the background processing of transactions. Sounds complicated, right? Well, the key to understanding how it all works is understanding the difference between a payment processor and a payment gateway.
Venmo itself serves as a payment gateway, meaning it functions as a user interface that interacts with your customers and allows them to initiate transactions. However, it needs to integrate with a payment processor—like PayPal—or an alternative solution to handle the actual processing of transactions.
So, if you aren’t integrating your Venmo payment gateway with PayPal’s payment processor, you’ll need to select another engine to process transactions behind the scenes. In this case, you can use Braintree as a replacement for PayPal’s processing capabilities. Braintree has the capability to act as both a payment processor and a payment gateway; it can seamlessly integrate with Venmo’s payment gateway to fill the payment processor function in place of PayPal.
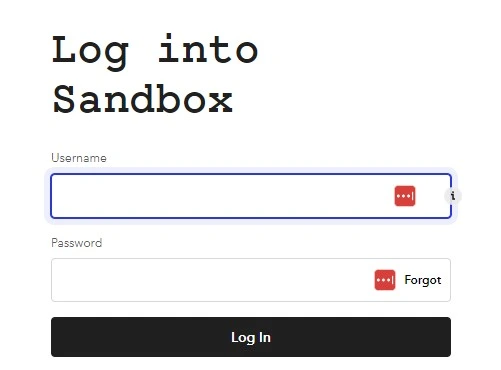
In short, if you don’t have PayPal, you’ll need to use Braintree as a substitute. Once your Venmo account is integrated with Braintree, you’ll have access to a sandbox control panel that authorized employees can access to review and monitor Venmo transactions.
How Can Customers Set Up Venmo to Pay for My Business?
First and foremost, customers must determine their eligibility to use the Venmo platform. All users must be located in the United States to transfer funds, and all payments must be received in US dollars. So, small business owners who need to conduct international transactions should look into other platform options.
As long as you and your customer base are eligible to use the platform, there are a variety of different means by which Venmo users can send payments for goods and services.
QR Codes
On your Venmo profile, you’ll see a small QR code icon hovering next to your profile picture. Simply click on this icon, and a QR code will pop up. Customers can scan the code right from your screen. They’re then taken directly to your professional profile, where they can confirm the payment sum and complete their purchase. However, it’s important to note that this payment method is done through the app—meaning your customers will need an existing Venmo account to send payments with your company’s QR code.

Initially, you may need to guide your customers through this process. However, QR codes have been around for years and were used widely during the COVID-19 pandemic’s social distancing measures. As a result, consumers are growing more comfortable using them—with some studies predicting QR usage of almost 20% between 2022 and 2025.[1]Digimark. “Why QR Codes Are More Popular Than Ever“. Accessed June 16, 2023. After all, the simplicity of QR codes is tough to beat. You can even print out copies of this code to distribute around your in-person locations.
The Venmo App
Customers who are unfamiliar or uncomfortable with using Venmo’s QR code features can still find you by searching for your business name in their app. However, make sure they are inputting your profile name directly, as other identifiers like phone numbers and email addresses won’t lead to your business.
If your customer is having trouble finding your profile, they can tap on the “businesses” tab by their search bar to filter for professional accounts. The top businesses adjacent to your profile name will automatically be highlighted when searched.
From there, customers can simply submit the agreed-upon price along with any notes or feedback they have for the business.
So, customers can find your Venmo account either by scanning your unique QR code or by manually looking up your name through the app’s search feature. You can also send a payment request for a specified amount directly to your customers by searching for their profile or scanning the QR code found next to their profile picture. From there, the customer will be able to remit payment through their preferred method, including their Venmo balance, credit or debit card, or linked bank account.
A Mobile App or Business Website
eCommerce storefronts can also integrate Venmo into their app or website to enable the platform as a payment option. This not only streamlines the process for customers but also allows them to utilize a payment option they trust. However, you’ll need to integrate a button allowing customers to pay with their Venmo account.
There are multiple ways to approach this integration process, including using either PayPal or Braintree to manage the transactions. Once you have your Venmo business profile and either your Braintree or PayPal account set up, you might need to hire a web developer. They will complete the integration of the button directly into your company’s website or application.
Receiving Money From a Business Transaction on Venmo
When a customer pays via Venmo, they’re transferring payment to your business profile from either their bank or their existing Venmo balance. Their payment sits in your account, and you can then choose to pay vendors or partners directly in Venmo from that account balance. Or, you can transfer the funds to your linked bank account. The payment will go through instantly if you pay a 1.5% fee or within one to three business days for free.
You can only link one account to your Venmo, meaning sums transferred out of both your personal and your business profiles will end up in the same bank account. This could create oddities on your balance sheet, so it may be best to avoid transferring sums out of your linked private account.
What’s more, Venmo does accept transfers from other merchants through platforms like Poshmark and SeatGeek.
Choosing the Best Payment Option for Your Business
Venmo can often appear upfront as a strong option for small businesses due to its simple user interface and features. However, it’s not your only option—or necessarily even the best option. Online payment processing designed with business explicitly in mind can offer higher levels of customer satisfaction. That’s where PaymentCloud can help.
PaymentCloud is a merchant services provider that, above all else, prioritizes personalization. We know your business is unique, and it deserves a payment processor that meets your needs. Cost-effectiveness, security, integration capability—whatever your primary concerns are, we’ll find the payment processor perfect for you. Ready to discover the perfect online payment processing solution for your small business? Reach out to PaymentCloud, and let’s start the search.
Together, we make so much cents. (And dollars, too!)
Frequently Asked Questions
Does Venmo work internationally?
No—Venmo is only available for payments made with US dollars, and users must be located in the United States to complete a transaction. If you need to send or receive payments while abroad, create an account with PayPal instead.
How do I know if my Venmo is a business account?
Log into your account on the Venmo app or website. If your account is a personal account, you’ll see an option to create a business account in the dropdown menu under your profile. If you already have a business account, you’ll instead see the option to switch between your business and personal accounts.
How do I log in to my Venmo business account on my computer?
Use your personal account credentials to log in. You’ll need the Venmo mobile app to verify your identity. Once logged in, you can access your business account statements. You can also easily switch between your business and personal profiles.