 Dedicated Support Team

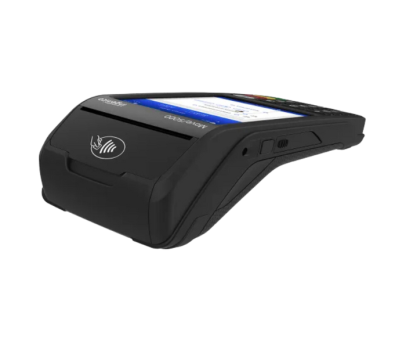
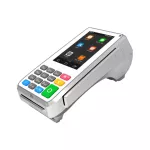
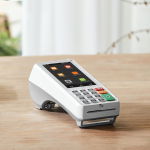
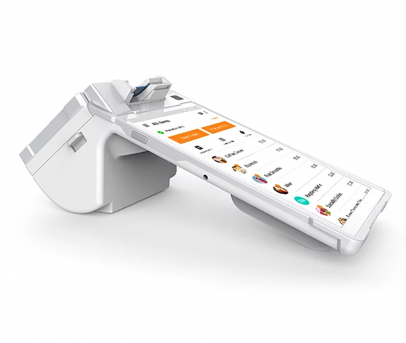
The PAX A80 Smart Keypad credit card machine, also known as the Pax A80 countertop wireless terminal, is your all-in-one terminal for magstripe, EMV chip, and NFC-enabled contactless payments. Equipped with a full keypad, this intuitive Pax A80 countertop smart card terminal simplifies accepting payments and digesting important data. It ensures seamless transactions, making it a versatile credit card machine suitable for any countertop setup!
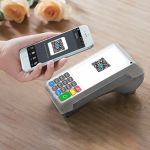
Effortlessly accept payments using ApplePay®, Google Pay®, etc.
The built-in printer instantly produces receipts at 50 lines per second—2¼ in. paper roll included!
The 4” HD touchscreen display and smart keypad offer a user-friendly interface.
This easily operated device allows you and your customers maximum ease while navigating payments. Powered by the Android operating system, the PAX A80 Smart Keypad provides flexible payment options via touchscreen and keypad. Whether your business is a restaurant or a retail store, the Pax A80 4G terminal has everything you need, including Apple Pay compatibility, battery efficiency, and a camera for enhanced security. Manage transactions seamlessly with tap-to-pay functionality and paper size that suits your needs. Connectivity options like WiFi, Ethernet, Bluetooth, and 4G ensure reliable network access, while the sim card slot offers additional flexibility. With ports for peripherals and a durable screen, this terminal is designed to meet your business needs effectively!
PayDroid powered by Android 6.0/7.1
7.12" x 3.3" x 3.19"; 0.81 lbs
Dial, IP, WiFi
Chip & PIN, NFC Contactless, Magnetic Stripe
Input: 100-240V AC, 50Hz/60Hz | Output: 9.0V DC, 1.0A
Quad-core Cortex A53, 1.2 GHz
1 RS232 | 1 PSTN | 1 Ethernet | 1 PINpad | 1 micro-USB 2.0, OTG | 1 Host USB 2.0 | 1 Phone
1GB DDR + 8GB eMMC | 1 x Micro SD card slot, supporting up to 32GB
0.3 Megapixel, front-facing
Printer speed: 50 lines/sec
Paper roll outer diameter: 50mm (2in)
15.6” FHD + 15.6”HD
Optional 720mAh | 7.4V / Adapter (Input: 100-240V AC, 50Hz/60Hz | Output: 9.0V DC, 1.0A)
N/A
Apple Pay, Google Pay, Samsung Pay, Android Pay, Visa payWave, MasterCard PayPass
Edge/Cash Discount
EPX, First Data, TSYS
PCI PTS 6.x SRED | EMV L1 & L2 | EMV contactless L1 | Visa payWave | Mastercard contactless | American Expresspay | Discover D-PAS | JCB J/Speedy | Interac Flash L2 | Mastercard TQM | IC | CE | RoHs | UL | FCC
June 2019
Your terminal should arrive programmed with these features. If it does not, contact your merchant services provider to request they enable this feature on your account. Simply power cycle the terminal to download the changes.
You can accept every major card—Visa, Mastercard, American Express, and Discover.
Yes, the PAX A80 can be wireless via a WiFi connection. It may also be plugged in via an Ethernet connection.
For WiFi, follow these instructions:
– Android Terminal:
– Traditional Terminal:
For Ethernet, follow these instructions:
The default password for the PAX A80 is 9876.
Follow these steps to calibrate the PAX A80 screen:
The PAX A80 uses thermal paper that is 2.¼ in. wide and 85 ft. long.
The PAX A80 comes installed with a 720-mAh 7.4V battery.
$549.00
Original price was: $380.00.$0.00Current price is: $0.00.
Original price was: $309.00.$0.00Current price is: $0.00.
Original price was: $237.00.$0.00Current price is: $0.00.