 Dedicated Support Team

Claim in the next 2 hours to take advantage of our FREE terminal offer.
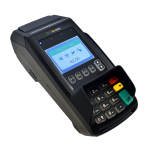
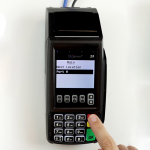
The Dejavoo Z8 Tri-Comm (Dial, IP, WiFi) credit card machine is a multifaceted countertop terminal that supports magstripe, EMV, and contactless payment options. Its stylish design makes it an excellent fit for a range of business types, and its backlit LCD display and fifteen-key keypad offer the best of both worlds: sophistication and ease of use. Ideal for restaurants and retail storefronts, the Z8 is where form meets function, making it an outstanding fit for merchants prioritizing versatility and aesthetics.
No matter your payment needs, the DejaVoo Z8 is here to help you process transactions swiftly and securely from anywhere.
Z8 users employing Aura software can select the "Call Me" option and receive a call from a support representative.
Use the Z8’s daily and summary report features to catch up on important business stats.
This 2.25” graphic printer rapidly produces customer receipts at 100mm per second, providing your customers an efficient checkout experience.
Say goodbye to manual transaction settling with the DejaVoo Z8’s convenient auto batch option.
The DejaVoo Z8 has everything you need to get your business up and running. It features a built-in receipt printer and an LCD display and supports EMV chip cards, magstripe, and contactless payments like Apple Pay. Its wireless capabilities ensure connectivity for on-the-go transactions, while its user-friendly interface serves as an added bonus. If you’re looking for a consistent, no-fuss payment solutions tool, the DejaVoo Z8 has you covered.
Open Architecture Linux
L x W x H (inches): 7.5 x 3 x 3 | Weight: 0.77lbs
Ethernet | Dial-up Modem | 2 x RS232 | 2 x USB | WiFi (Optional)
Contact Card: User Card: ISO 7816 ID-1 1.8V/ 3V/ 5V T=0, T= 1 | SAM Card (up to 4): 2 | Contactless (standard): ISO 14443 Type A, B, ISO 18092 NFC and Milfare® and SONY® Felica ~ Working frequency 13.56MHz | Magnetic Strip: ISO 7810, 7811, and 7813 Triple Track Bi-Directional
Ethernet | USB
Ethernet | Micro USB | 2 x RS232
32 bits 400MHz Secure Microprocessor
DDR RAM: 64MB | Flash: 128MB | Micro SD Slot Optional
N/A
Built-in graphical printer | 2.25” x 80’, 4” per second
2 ¼" x 80’ thermal paper or less
2.4" backlit color LCD
2600mAh
Replaceable lithium-ion battery
N/A
Can accept Apple Pay, Google Wallet, Samsung Pay, and other similar payment methods
Cash Discount and Surcharge
TSYS and First Data
Security & Payment: EMV® L1 L2, JCB J/ Speedy, PBOC L1 L2, PCI PTS, TQM, American Express®, MasterCard PayPass®, Visa PayWave® | Safety, EMC: BSMI, CE, FCC, RoHS
September 11, 2019
The DejaVoo Z8 accepts all popular credit card options, including Visa, Mastercard, American Express, and Discover.
For best results printing receipts with the DejaVoo Z8, it is recommended that you use thermal paper rolls that are 2 ¼” x 80’ or less (for example, 2 ¼” x 55’ is a standard size that is congruent with the dimensions of this device).
While the Z8 and the Z11 both exist under the DejaVoo banner, there are some key differences to note. Whereas the Z8 has a 2.4” color LCD display, the Z11 has a 3.5” Color TFT-LCD display. The Z8 also lacks touchscreen capabilities, whereas the Z11 offers users a digital signature option. The Z11 lets users upload multiple images while the terminal itself is in idle mode, which is not a feature offered by the Z8.
For Ethernet:
For WiFi:
The IP address should not display with zeros and show as connected. For those connecting via Ethernet, be sure there is a LAN cable connected to the LAN port on your DejaVoo Z8.
Yes, the DejaVoo Z8 accepts Apple Pay, in addition to Google Wallet, Samsung Pay, and other similar mobile payment services.
The DejaVoo Z8 payment terminal has been discontinued for the time being. Merchants who are looking for similar features and usability should know that the Z9 and the Z11 both technically serve as the Z8’s replacement.
To turn off the DejaVoo Z8 and perform a hard factory reset, follow these steps:
Note: Performing a factory reset will erase all data on the device, including transaction history and customized settings. Be sure to back up any important data before proceeding with a factory reset.
If you encounter any issues or require further assistance, please refer to the user manual or contact DejaVoo’s customer support.
The default manager password for the DejaVoo is 1 2 3 4.
Original price was: $309.00.$0.00Current price is: $0.00.
$272.90