 Dedicated Support Team

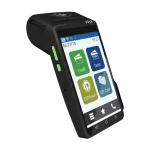
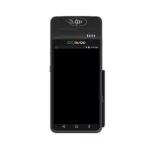
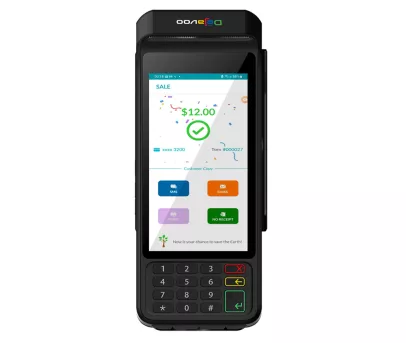
Introducing the Dejavoo QD4, a game-changing payment terminal that delivers advanced features in a sleek design. Using the QD4’s PIN pad, you can say goodbye to long lines and hello to seamless transactions—no matter how busy your day gets. Competitively priced and equally stylish, with an optional white finish, this state-of-the-art device is ideal for businesses seeking form and fashion. Discover the future of payment solutions with the Dejavoo QD4 terminal!
Whether scanning barcodes or capturing signatures, the 5-megapixel auto-focus camera ensures clear visuals every time.
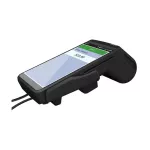
With the built-in 58mm thermal printer (no need for additional equipment), printing receipts has never been easier.
Offers the flexibility to connect via Ethernet, USB to Ethernet, or by utilizing the convenience of WiFi.
Enjoy an intuitive and user-friendly interface with this vibrant 5.5” Color LCD touchscreen, making payments easy for customers and merchants alike.
Never miss a payment with the reliably-quick Quad-Core @ 1.1GHz processor.
Never run out of power with a durable 7.4V, 2600mAh battery.
With an auto-focus camera, built-in thermal printer, and versatile connection options, the Dejavoo QD4 packs advanced features into a compact device. Its 5.5” color LCD touchscreen ensures intuitive, user-friendly navigation, which easily streamlines the transaction process. With the ability to accept numerous payment methods, such as Apple Pay, and equipped with Ethernet, Wi-Fi, and wireless capabilities, this reliable device ensures seamless integration into your business. Revolutionize your payment operations like never before with the Dejavoo QD4 terminal.
Secure Android
188 x 85 x 69mm
Ethernet - USB to Ethernet | WiFi (no dial)
EMV chips | PIN debit | and Contactless transactions
Battery | 5V 2A adapter (supports USB charging)
Quad-Core @ 1.1GHz
USB 2.0 host Dual | SIM or 1SIM & 1SAM, TF card x 1
1GB RAM, 8GB Flash
5M with auto-focus and flash
58 mm thermal printer | Printing speed 50mm per second
50 ft. paper roll
Large 5.5” color LCD with touch panel
7.4V, 2600mAh
The battery capacity typically provides long-lasting operating time for daily use. However, the duration can vary based on usage patterns and connectivity options.
N/A
MasterCard PayPass, Visa PayWave, ExpressPay, and D-Pass (in progress), Apple Pay, Samsung Pay, Google Wallet
Cash discount | Surcharge program
TSYS
PCI-DSS compliant | PCI PTS 5.0
2019
Setting up the Dejavoo QD4 is a straightforward process. Here’s a step-by-step guide:
Please Note: Specific setup instructions may vary, so it’s always recommended to consult the user manual provided by Dejavoo or reach out to their customer support for detailed guidance tailored to your device.
The main difference between the Dejavoo QD2 and QD4 is that the Dejavoo QD4 cannot connect via GPRS, 3G, or 4G.
The default password for the Dejavoo QD4 is 1 2 3 4.
$549.00
Original price was: $237.00.$0.00Current price is: $0.00.
Original price was: $420.00.$0.00Current price is: $0.00.
Original price was: $342.00.$0.00Current price is: $0.00.