
 Dedicated Support Team

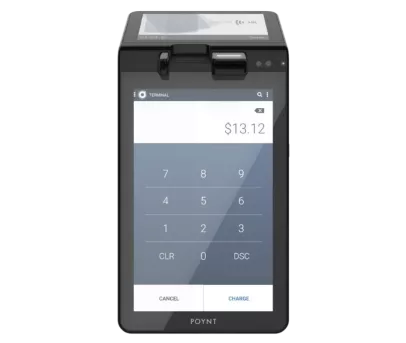
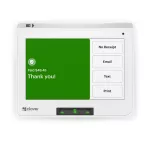
Meet the 3rd Generation Clover Mini credit card machine — an easy-to-use payment solutions device and accompanying triangle hub. With its powerful design and streamlined interface, the Clover Mini 3rd Gen terminal makes it easier than ever for business owners to process payments, manage inventory, and secure customer payment information. The Clover Mini package includes essential components such as a card reader and optional cash drawer integration. This all-in-one solution is ideal for businesses looking for a versatile choice with its advanced features and robust performance. Elevate your business with Clover Mini’s EMV-compliant solutions, ensuring more secure credit card transactions than ever.
Stay plugged in with easy-to-access connection options, including Ethernet, WiFi, and 4G/LTE.
Cut out unnecessary steps with the Clover Mini device, whether you’re organizing inventory, verifying prices, or handling customer information.
Reach your customers more efficiently with the Clover Mini’s instant printing feature and various card reader options.
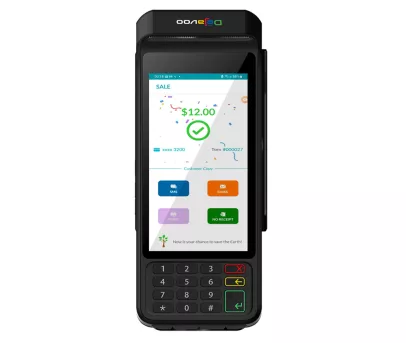
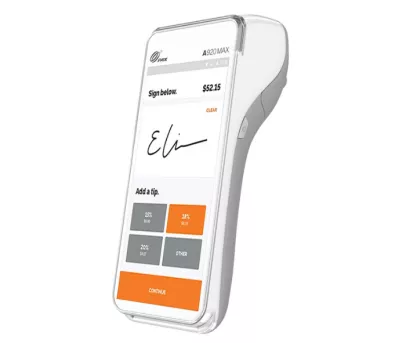
Accept customer payments via credit or debit card through Magstripe, EMV chip card, checks, or NFC contactless payment options like Venmo and Apple Pay.
Browse Clover's app store to download apps that will help you run your business as you see fit.
The Clover Mini combines technological innovation with customer-friendly features, offering users several ways to process orders. With its seamless design, 8” LCD touchscreen, and a front-facing camera for barcode scanning, the Clover Mini makes tasks like keeping track of receipts and inventory easy and accessible. Experience the convenience of contactless options like Apple Pay integration, and upgrade your business with the Clover Mini YJ3 LTE bundle today!
Clover hardened version of Androids 10.0 (API Level 29)
12 in x 10 in. x 6 in.: 5 lbs
Ethernet, WIFI, or 3G/4G
EMV chip card reader, NFC reader, and MSR reader
Hard Plugin
Qualcomm® Snapdragon™ octa-core processor
2 USB type A ports - 1A per port, Cash drawer port, USB type B port for connection to Clover and other supported POS Systems, Ethernet port
2-GB RAM, 16-GB Flash
Front-facing camera for 1D and 2D barcode scanning
Internal thermal receipt printer
2.25" Printer Roll Width and up to 50mm (2") diameter rolls
8” display • 1280 x 800 pixels
N/A
N/A
Apple Pay, Google Pay, Samsung Pay, Android Pay, Visa payWave, MasterCard PayPass
Cash Discount and Surcharge
N/A
PCI PTS 6.X
August 12, 2022
The Clover Mini printer uses 2 ¼ in. by 85 ft. thermal receipt paper rolls.
If your Clover Mini won’t turn on, there are a few troubleshooting steps you can follow:
Remember, if your Clover Mini is still under warranty, it may be eligible for repair or replacement depending on the nature of the problem.
Setting up your Clover Mini is a straightforward process. Here are the steps to help you get started:
If you encounter any issues during the setup process, refer to the user manual or contact Clover support for further assistance.
The Clover Mini 2’s OS is Android 8/10, while the Mini 3 uses Android 10. The Mini 2 is PCI PTS 5.X, while the Mini 3 is PCI PTS 6.X. The Mini 2 has a 7” display, while the Mini 3 has an 8” display. The Mini 2 has 4 USB type A ports with 1A total per stack. The Mini 3 has 2 USB type A ports with 1A per port. The Mini 2 has a front-facing 5MP camera in the top right, while the Mini 3 has a 5MP camera in the center with a privacy LED indicator.
The Mini 2 has volume control through UI only, while the Mini 3 has dedicated tactile volume control buttons and through UI.
The Clover Mini is a small countertop POS, while the Clover Flex is a handheld POS. The screen on the Clover Mini is 8”, while the screen on the Clover Flex is almost 6”. The Clover Flex allows users to email or text digital receipts along with printing them with its built-in thermal dot printer. The connectivity for the Clover Mini includes Wi-Fi, ethernet, and LTE connectivity, while the connectivity for the Flex includes WiFi and LTE. The Clover Mini also provides an option to add a cash drawer.
Yes, the Clover Mini has an offline payment option enabled by default.
No, processors cannot reprogram Clover POS systems. However, to reset a Clover device, you can send an empty PUT request to the /v1/device/reset endpoint. Include the required headers for your request. Any in-flight commands from the POS will be canceled, and the device will return to its original state.
Yes—Clover Mini can function as a customer-facing payment terminal when connected to the Clover Station Duo, which has a 14” screen.
Yes— through their app market partners, Clover works with Shopify and many other eCommerce platforms.
The Clover Mini does not have a battery.
Yes, you can connect the Clover Mini to the Clover cash drawer.
Yes, all Clover devices are PCI-compliant.
Original price was: $342.00.$0.00Current price is: $0.00.
Original price was: $420.00.$0.00Current price is: $0.00.

Original price was: $230.00.$0.00Current price is: $0.00.