 Dedicated Support Team

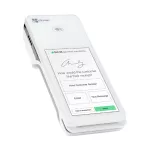
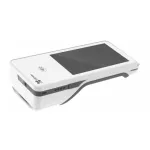
The Clover Flex 2 terminal is a powerful, portable payment solution perfect for on-the-go businesses. The sleek point-of-sale system combines state-of-the-art features with seamless WiFi or 4G/LTE connectivity. This bundle integrates advanced features such as a barcode scanner and supports Clover Flex 3rd generation functionalities, making it a versatile choice that ensures smooth transactions. Accept payments, manage inventory, and easily streamline operations with the ultimate business companion for mobile businesses.
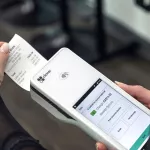
Press the dedicated external button to use the built-in 5MP camera as a 1D and 2D trigger-activated barcode scanner.
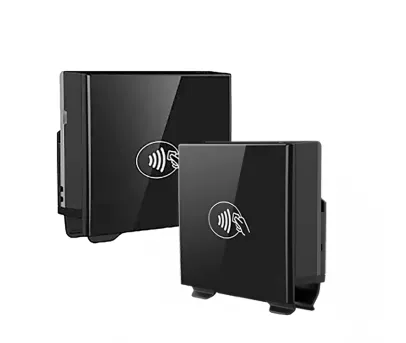
Using magstripe cards, EMV chip cards, and contactless payments has never been easier. Able to use Apple Pay and Google Pay also.
The built-in receipt printer can increase your productivity with exceptional precision for flawless outputs.
Discover the future of payment processing with the Clover Flex 2 Bundle. This innovative payment solution equips your business with advanced features in a sleek, portable design. Enjoy seamless WiFi or 4G/LTE connectivity, enabling you to accept payments, manage inventory, and optimize operations from anywhere. The Clover Flex 2 Bundle effortlessly handles inventory via the Clover Flex inventory app. Accept Apple Pay, EBT, manage gift cards, and handle pre-authorizations with the versatile Clover Flex 4G models. Enhance efficiency with the built-in barcode scanner and streamline your workflow using virtual terminal access. Elevate your business operations with the Clover Flex series, designed for effortless integration and revolutionary performance. Transform the way you do business with this powerful, PCI compliant bundle.
Clover hardened version of Android (AOSP) 8.1 (API Level 27, Oreo) upgradable to Android (AOSP) 10.0 (API Level 29)
7.7 x 3.2 x 2.0in; 1.03lbs without cradle and sleeve, 1.16lbs with sleeve
Wi-Fi, 4G/LTE
EMV chip card reader, NFC reader, and MSR reader
Rechargable; 8 hour battery life
Qualcomm Snapdragon 660 octa-core processor
USB Type B – Device (with Optional Clover Flex Cable Kit)
2-GB RAM, 16-GB Flash
Yes; Built-in 5MP camera for 1D and 2D trigger-activated barcode scanner.
Internal Thermal Printer
Roll width: 57 +0/-1 mm (2.25 in.) Roll diameter: 40 mm max (1.57 in.)
5″, 720×1280 XHDPI display (320ppi)
Lithium-Ion 16.6Wh, 2190mAh. Rechargeable
At least 8 hours of use for a typical SMB
Apple Pay, Google Pay, Samsung Pay, Android Pay, Visa payWave, MasterCard PayPass
Cash discount and surcharge
N/A
PCI PTS 5.x I EMV Contact L1 and L2 I MasterCard TQM I EMV Contactless L1 v3.0 I Visa payWave I Mastercard Contactless | American ExpressPay | Discover DPAS | JCB Contactless | UPI Overseas | Interac Flash
N/A
The Clover Flex 2 runs on Android 8.1, while the Flex 3 uses Android 10.X. The Flex 2 has a magnetic stripe interface, PCI PTS 5.x certification, a 5.0” 1280×720 IPS HD display, and weighs 1.03 lbs. The Flex 3, with PCI PTS 6.x certification, features a 5.99” 1440×720 IPS HD display and weighs 1.16 lbs. Charging the Flex 2 takes 1.5 hours with a cradle; the Flex 3 takes 2 hours with a travel kit and supports USB Type C PD charging. The Flex 2 has USB Type B connectivity with optional kits, while the Flex 3 works only with the Clover Developer Kit and lacks LAN connectivity. The Flex 2 supports 3G with 2G fallback in Argentina, and the Flex 3 supports 4G/LTE with 3G fallback in Argentina and India.
The Clover Flex is a handheld, portable POS system, while the Clover Go is a mobile POS system that is attached to your phone. Clover Go accepts chip, dip, and contactless payments, including Tap-to-Pay on iPhone, Apple Pay®, Google Pay® and Samsung Pay®. In contrast, Clover Flex only accepts chip, swipe, and contactless payments, including Apple Pay®, Google Pay® and Samsung Pay®. The Clover Go’s receipt system allows you to track the status of outstanding balances, and the Clover Flex has a built-in thermal dot printer for receipts. The Clover Go’s connectivity options include a micro USB for charging and Bluetooth® to mobile device for payments, while the Clover Flex’s connectivity options include WiFi and LTE. The battery life for the Clover Go is an estimated 160 dip, 160 swipe, or 130 contactless transactions per charge, while for the Clover Flex, it’s at least 8 hours of use for a typical SMB.
The Clover Flex uses 2 ¼ in. by 85 ft. thermal paper rolls.
To factory reset a Clover Flex device, you can follow these steps:
Please Note: Performing a factory reset on the Clover Flex device will erase all data and settings, including installed apps, configurations, and stored information. Make sure to back up any important data before proceeding with the reset.
To set up your Clover Flex device, please follow these steps:
Please Note: The specific steps and prompts during the setup process may vary slightly depending on the firmware version of your Clover Flex device. Follow the on-screen instructions and refer to the device’s user manual for more detailed guidance.
To troubleshoot issues with your Clover Flex, first refer to the user manual. Additionally, you may visit Clover Support to access various resources, including FAQs, troubleshooting guides, and software updates. You can search for specific topics or browse the available resources to find solutions to common issues.
Yes, the Clover Statio Solo is compatible with Clover Flex devices.
You can continue to take payments when not connected to WiFi by toggling the Offline Payments option. This option is enabled by default for Clover Flex. However, you should note that when you take payments offline, you risk payments being declined or only partially paid when the device goes back online.
Yes, you can manage inventory with the Clover Flex with its built-in camera and barcode scanner that lets you instantly scan items into your inventory.
While Clover Flex accepts cash, the Clover cash drawer only connects to the Clover Station Solo, the Station Duo, and the Mini.
No, processors cannot reprogram Clover POS systems.
Invoicing is included in your service plan as a feature of Clover® Virtual Terminal. The Virtual Terminal is a web application that comes pre-loaded in your dashboard in your Clover account, accessible from the Clover Flex.
Yes, Clover Flex has a built-in barcode scanner, allowing you to scan items.
Yes, the Clover Flex allows for tableside ordering.
The Clover Flex has an internal thermal receipt printer, so it does not use ink.
Yes, you can use the internal thermal receipt printer to print receipts from your Clover Flex.
The battery lasts for at least 8 hours for a typical SMB.
Original price was: $119.00.$0.00Current price is: $0.00.

Original price was: $222.00.$0.00Current price is: $0.00.
Original price was: $95.00.$0.00Current price is: $0.00.
Original price was: $309.00.$0.00Current price is: $0.00.
$367.00